Windowing controls how image voxel values are mapped onto grayscale levels
when a digital image is displayed. Windowing allows the viewer to adjust
image brightness and contrast and may help to emphasize specific image structures.
Windowing is critical for CT images, where the grayscale values reflect a range
of CT numbers expressed in Hounsfield units (HU).
The Hounsfield scale (Fig. 10.1) is obtained using a linear transformation
of the X-ray attenuation coefficients for each voxel ()
into units where the radiodensity of water (at standard temperature and pressure)
is zero and the radiodensity of air is equal to –1000 HU:
Here K is an integer coefficient equal to 1000 (or 1024 in some CT systems),
and and are the attenuation coefficients
of water and air.
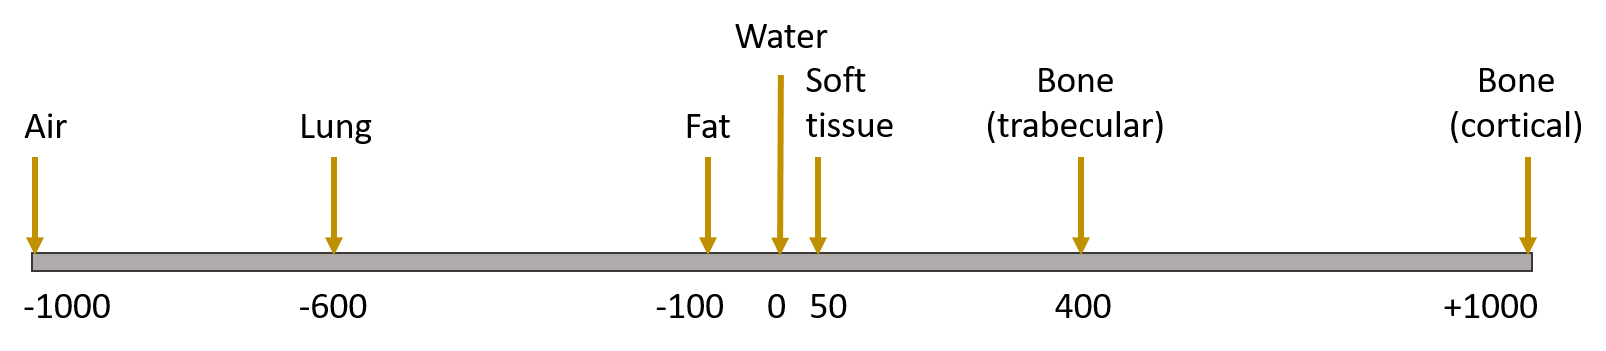
Fig. 10.1 Typical CT numbers (Hounsfield units) for various tissues.
The CT numbers in medical images typically range between –1000 HU for air
to over +1000 HU for dense bone. Computer displays are usually capable of showing
256 grayscale values, and human eye can distinguish even fewer levels.
The full range of 2000 HU distributed over 200 gray levels would lead to each level
representing 10 HU. The differences between important image structures can be
emphasized through windowing, or selecting the range of values (window width, W)
and the center value (window level, L) to be mapped onto grayscale.
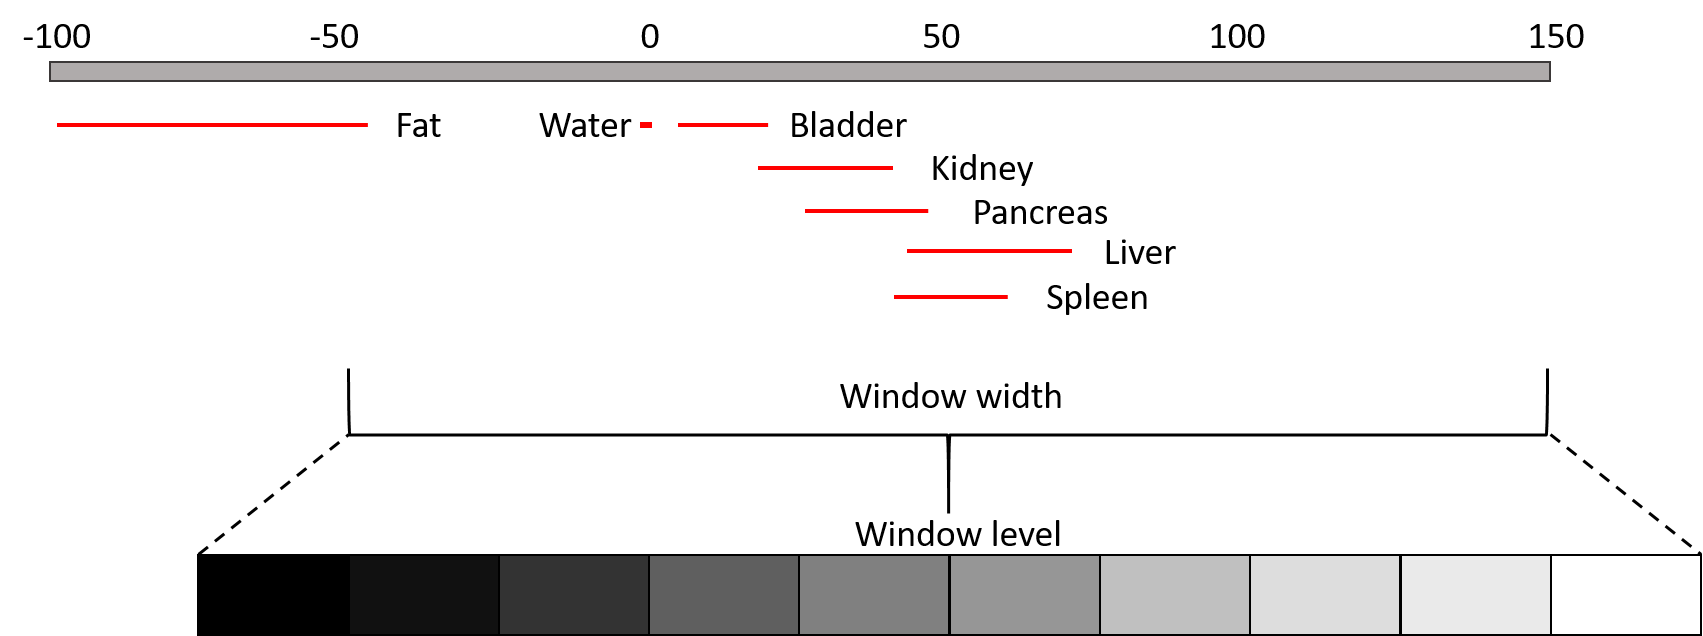
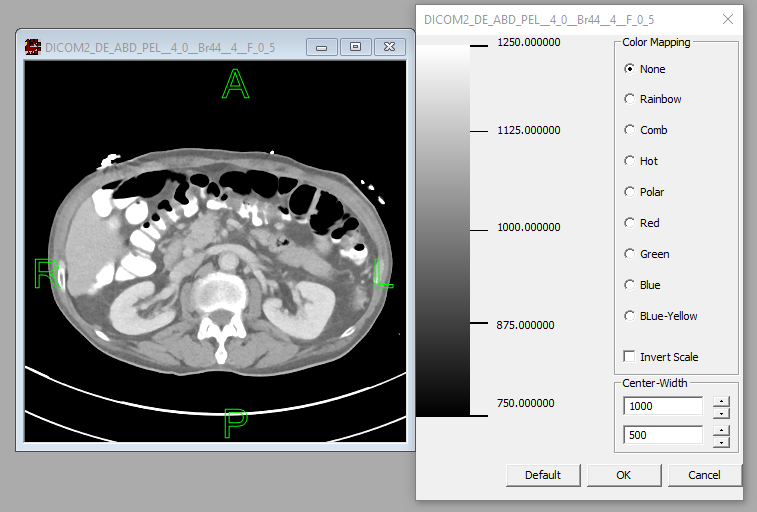
For example, abdominal organs are often viewed in a narrow window centered
at a low, positive value in order to highlight the differences between
tissues with closely spaced CT numbers (Fig. 10.2).
Fig. 10.2 A narrow window (L: 50; W: 200) for abdominal organs, with typical
ranges of CT numbers shown by red bars.
The window width, or the range of CT numbers in the image, changes the image
contrast. Increasing the width decreases contrast, and narrowing the window
increases contrast. The window level, or the CT number at the center of the window,
changes the image brightness. Increasing the window level decreases brightness.
For a given window level and width, the window limits, the upper limit (UL)
corresponding to white and the lower limit (LL) corresponding to black
grayscale value, are determined as follows: UL = L + W/2; LL = L – W/2.
In FireVoxel, windowing can be quickly and interactively adjusted using
the Change Width/Level tool,
best suited for adjusting the grayscale window of CT images.
Alternatively, ViewFilter option
on the Layer Control panel enables precise control of window level
and width for all images, including real-valued images displayed as color maps.
Both these methods can be used for windowing CT images loaded
as real-valued volumes (in HU, without conversion) or converted to unsigned
integer intensity values (see Load > CT data conversion).
For converted images, the window level (L) and width (W) in ViewFilter
are shown as converted values. For example, if the conversion from voxel
Hounsfield units (voxel_HU) to voxel intensity (voxel_intensity) is given by
voxel_intensity = voxel_HU + 1024, then the window level
of the intensity image is L(intensity) = L(HU) + 1024, and W(intensity)=W(HU).
Another method for selecting the window level and width is via the main menu command
Volume > Window Level setting
> Optimal for All (or Optimal for current timepoint).
This method helps the user to quickly adjust the grayscale window to view
a given dataset. Note that these commands select the window center and width
automatically and do not target a specific tissue.
FireVoxel’s Change Width/Level toolbar tool is intended
primarily for adjusting the grayscale window for integer images in the
active layer. However, the tool will also act on real-valued images
displayed as color maps, but may not be optimal for this purpose.
For adjusting width/center of colormaps see Layer Control Panel >
ViewFilter.
To launch the tool, click the toolbar icon (cursor becomes
black/white circle). To exit, press Esc.
To use, click and drag the mouse across the image, horizontally or
vertically.
To increase the window width, drag the mouse horizontally to the
right. To decrease the window width, drag the mouse to the left.
To increase the window center, drag the mouse vertically up. To
decrease the window, drag the mouse down.
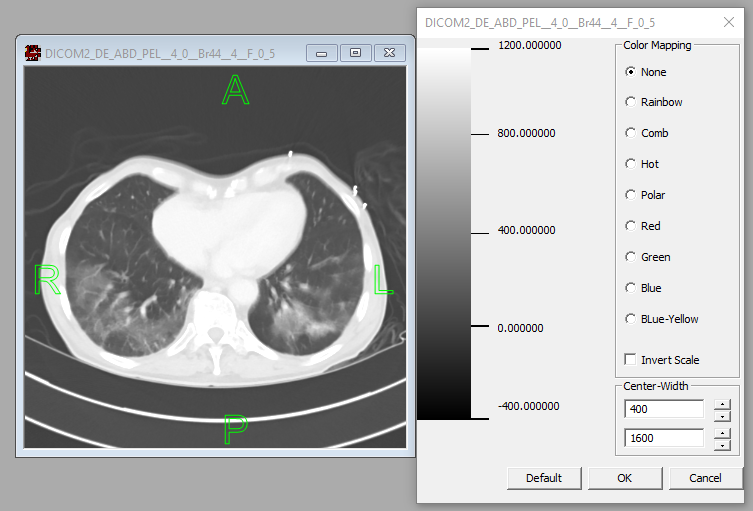
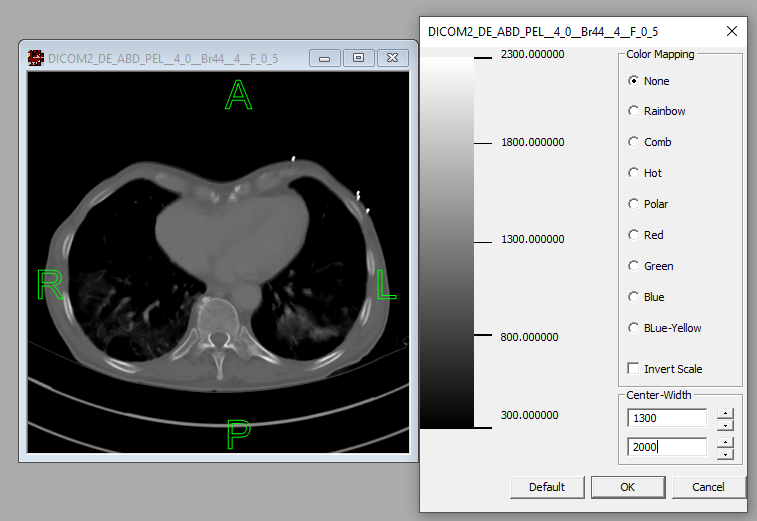
Windowing helps to highlight specific organs or tissues in a medical image.
Wide window (400-2000 HU) is suitable for displaying images with
widely varying attenuation values, such as the lungs or bones adjacent
to air and blood vessels. Narrow window (50-350 HU) is more suitable
for displaying soft tissues. Typical tissue-specific windows
(width/level combinations, HU) set using ViewFilter
for CT images converted to unsigned integer volumes,
may be as follows:
 )
into units where the radiodensity of water (at standard temperature and pressure)
is zero and the radiodensity of air is equal to –1000 HU:
)
into units where the radiodensity of water (at standard temperature and pressure)
is zero and the radiodensity of air is equal to –1000 HU: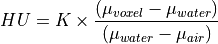
 and
and  are the attenuation coefficients
of water and air.
are the attenuation coefficients
of water and air.