By default, the main toolbar is docked on the right-hand side.
To select a different toolbar docking placement, use
File > User Interface Options >
Main Toolbar Alignment.
The position of the toolbar is changed immediately after this option
is changed in the User Interface Options.
When using FireVoxel on a laptop with a small screen,
it is recommended to dock the toolbar at the bottom of
the software window or leave the toolbar undocked, to have easy access
to all toolbar icons.
The toolbar can be undocked by hovering the mouse over its top edge
(if the toolbar is docked on the right or left) or over its leftmost
edge (if the toolbar is docked at the bottom). When the cursor becomes
a 4-arrow cross, the user may click and drag the toolbar to a new location.
An undocked toolbar can be positioned anywhere on the screen,
inside or outside FireVoxel’s main software window.
To dock the toolbar, double-click its blue title bar.
The toolbar will return to its docking position indicated
in the User Interface Options.
Each icon on the toolbar launches an individual tool.
With few exceptions, most of these tools duplicate the commands
that are available via the main menu.
To exit from the tools such as Zoom or Change Width/Level,
press Esc.
If the tool opens a dialog (e.g., Calculate Parametric Map or
EdgeWave Segmentation), click OK on the tool dialog to start
processing or Cancel to exit from the tool.
Undo and Redo features are available via the main toolbar icons.
These features are inactive (grayed out: /) for most commands.
These features become active (/) for some of those
commands that change the voxel values in the active layer without creating
a new layer or document window.
The features do not apply to commands that create new document windows
and layers, or create or edit raster ROIs, vector ROIs, or contours.
The Undo/Redo functionality is illustrated here using Invert as an example:
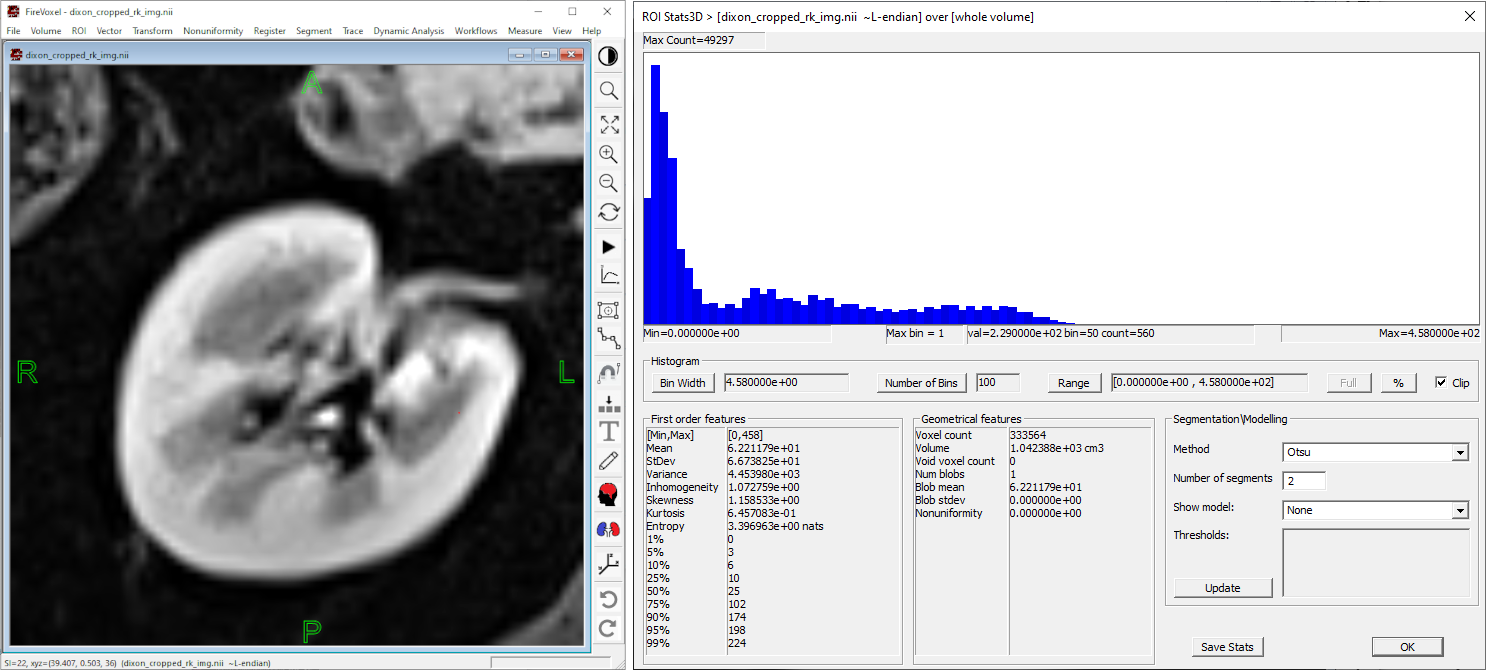
1. Original image – When the original (Dixon) image is opened in FireVoxel,
the Undo/Redo features are inactive.
Fig. 5.2 Original image and histogram. Undo/Redo inactive.
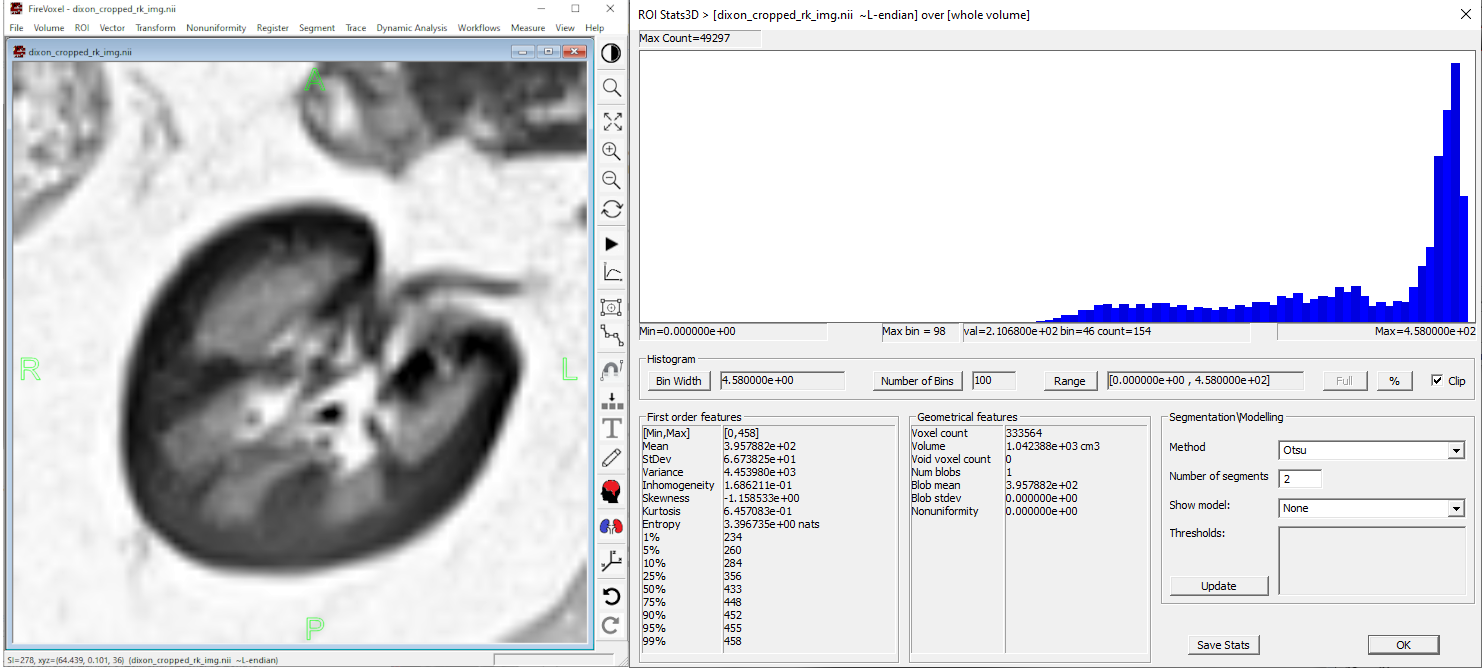
2. Inverted image – Select Volume >
Voxel value conversion >
Invert. The image is inverted and the histogram
is flipped around the middle of the interval.
Undo feature becomes active. Redo remains inactive.
Fig. 5.3 Result of Volume > Invert. Undo active/Redo inactive.
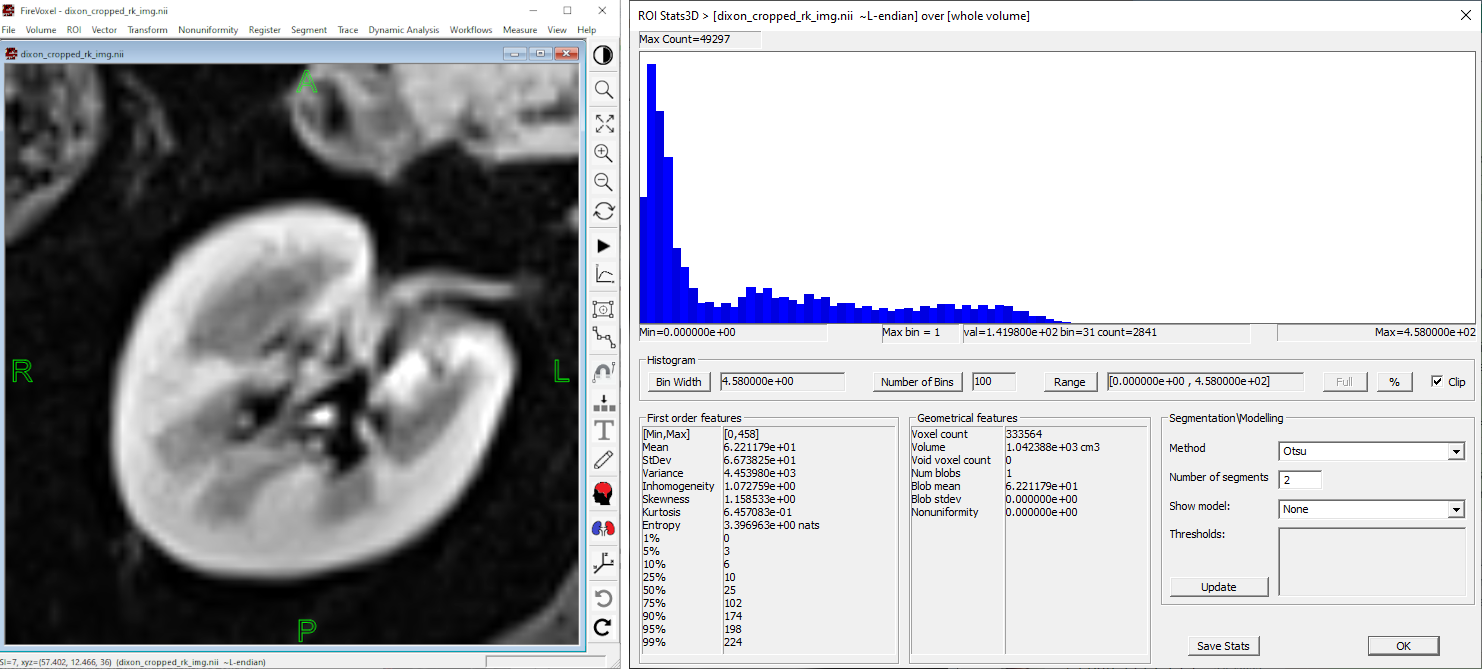
2. Undo Invert – Click Undo. The kidney image is restored
to its original state (before Invert was used) and the histogram is again flipped.
The Undo is now inactive, but Redo becomes active.
Fig. 5.4 Result of Undo command. Undo inactive/Redo active.
3. Redo Invert – Click Redo.
The image is inverted again, as after the first Invert
(Fig. 5.3).

 Insert Text - Currently inactive
 Undo – Active for selected commands
that change voxel values in the active layer.
Undo – Active for selected commands
that change voxel values in the active layer. Redo – Becomes active after Undo is used.
 /
/ ) for most commands.